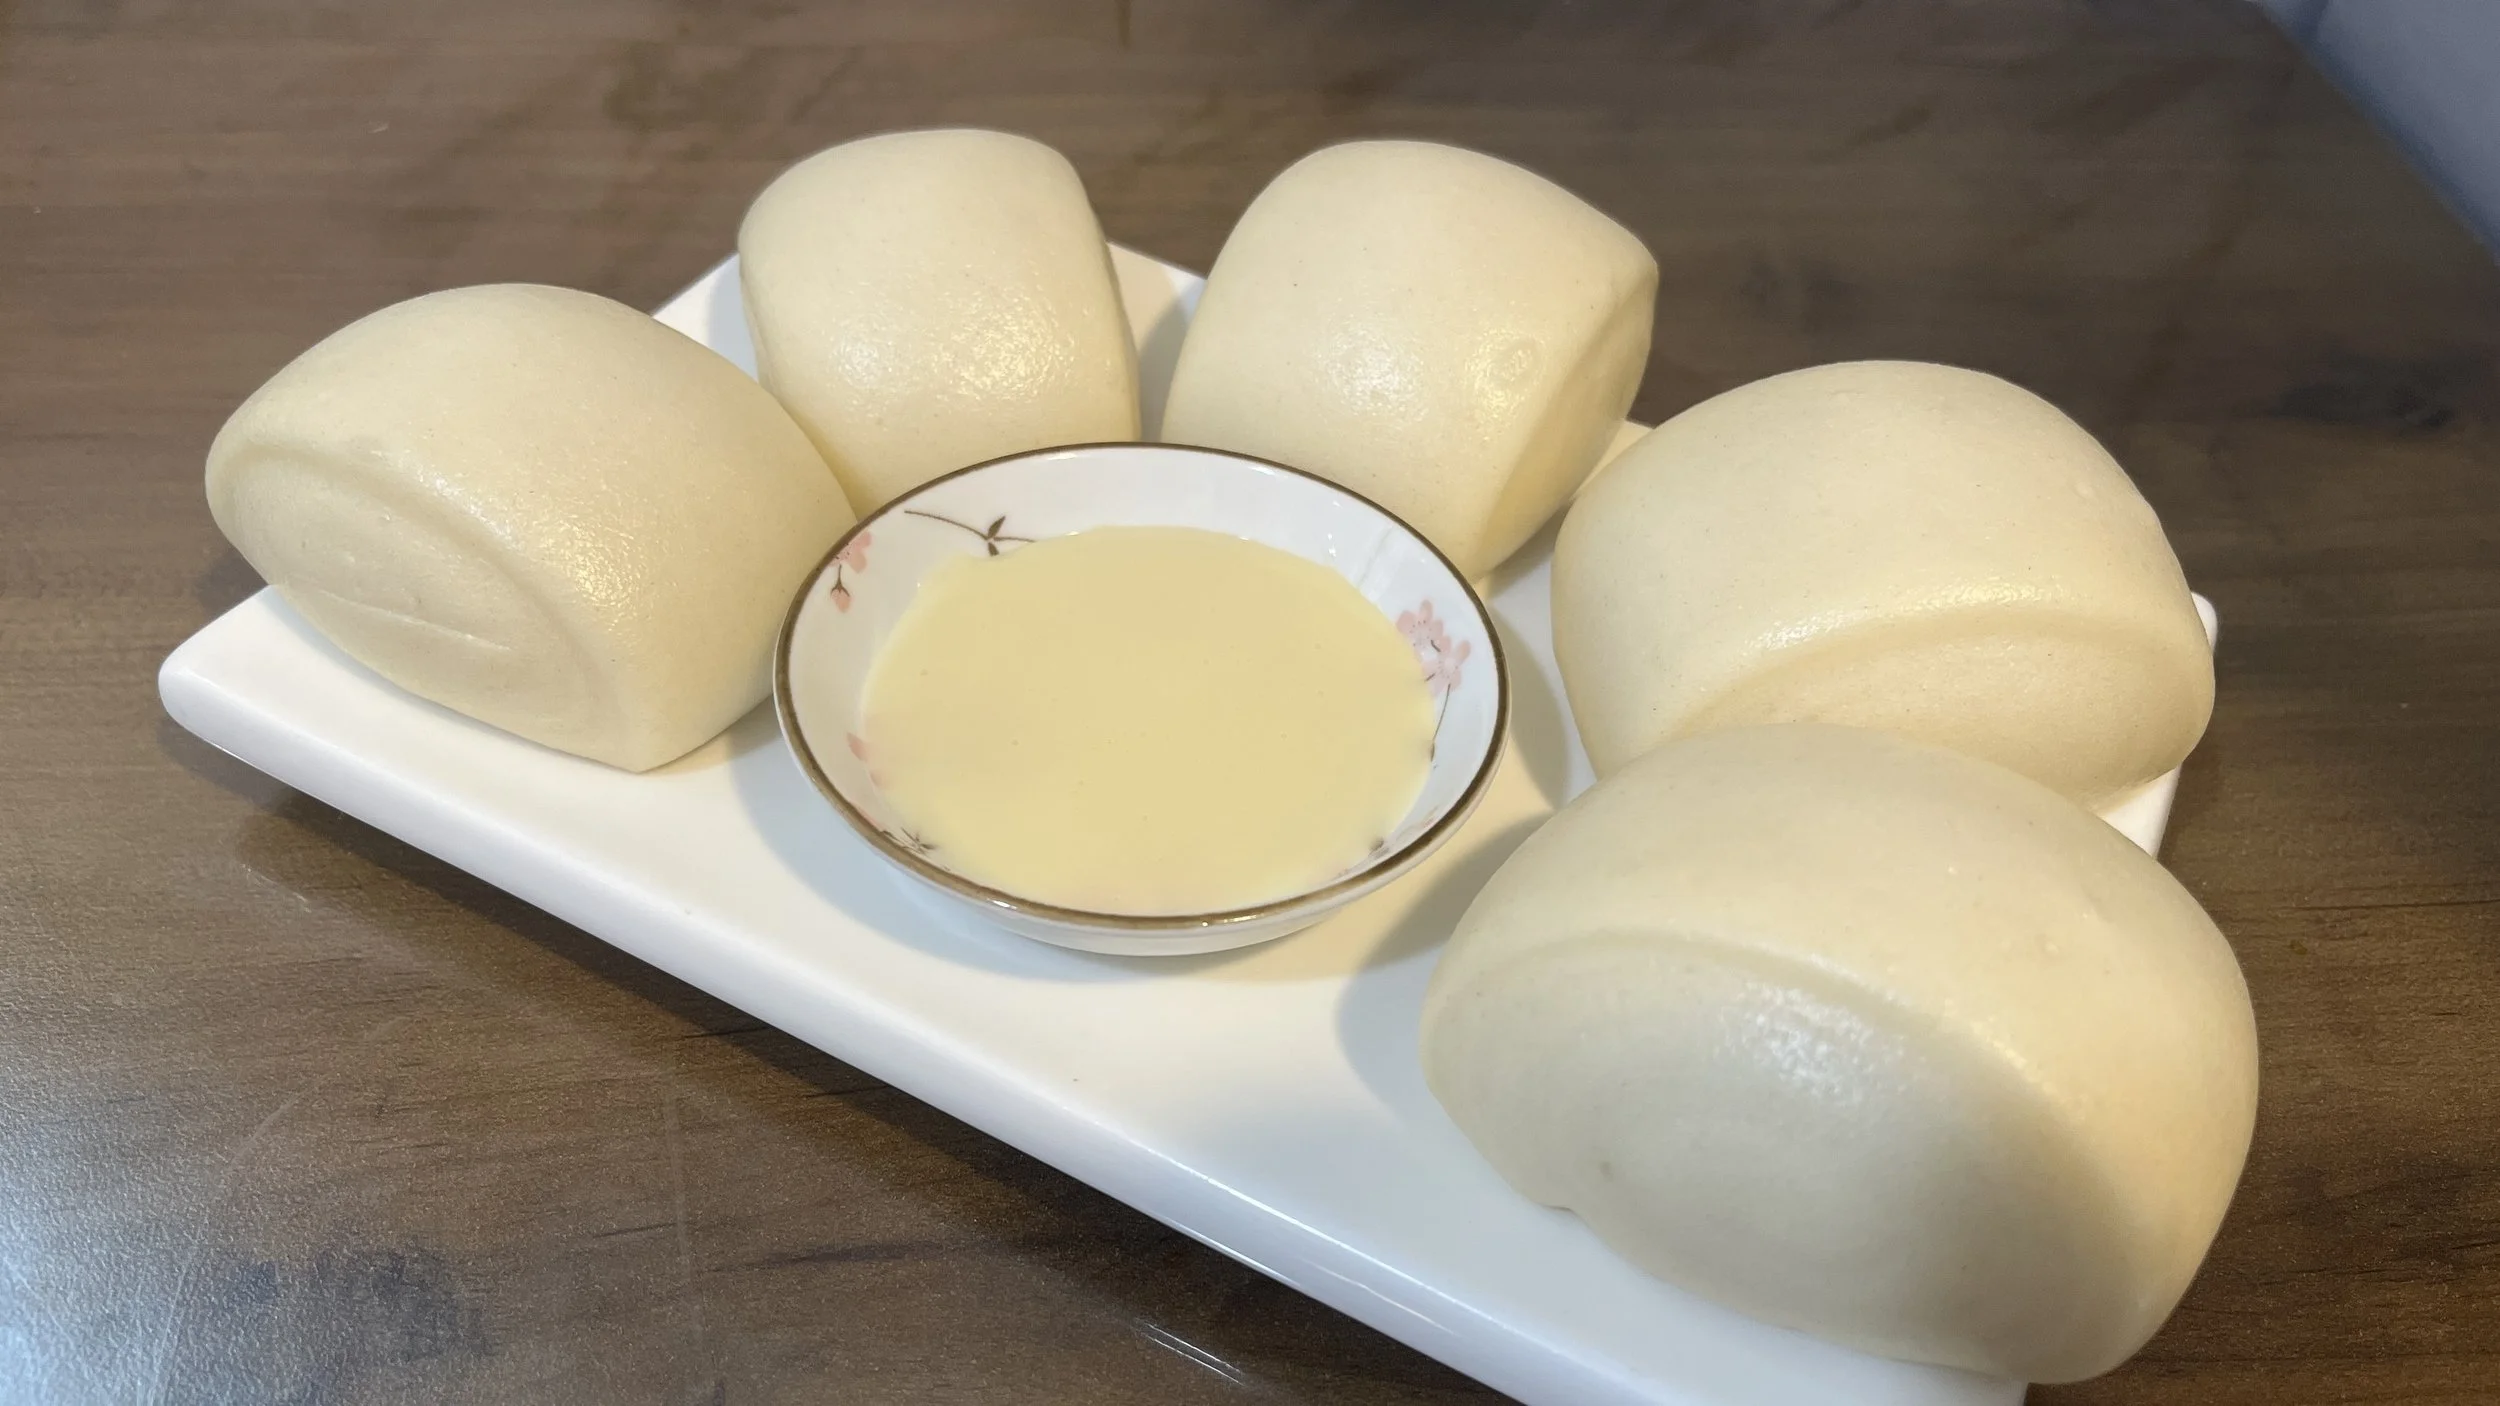
Dim Sum Chinese Custard Bun | Lai Wong Bao (奶黄包)
Sweet soft fluffy bun with a smooth creamy custard filling inside.

Chinese Custard Bun | Lai Wong Bao 奶黄包
LAi Wong Bao | Chinese Custard Bun
Are you a bun lover just like me? Let’s make custard buns today, also known as Lai Wong Bao - 奶黄包! Some of you may have seen my other bun recipes, but noticed that I haven’t made the custard buns yet! Of course I can’t leave these buns out!
It’s a nice sweet bun with a creamy custard filling. One of the popular Chinese steamed bao you can order at dim sum places. In this recipe I used the hard version to make the bun dough. This version will make a fluffier and whiter dough. If you just want a yummy and easy bun then check out the link here for the easy version.
Bun Dough Easy Version
This recipe is a little bit complicated, but if you follow the instructions clearly you will learn how to make these delicious buns by yourself! See here for the video with step-by-step instructions. If this dough is too much work, you can check out this steamed bun dough recipe for the easy version of the dough which work as well.
Scroll down to check out the ingredients needed for the Custard Bun with step by step instructions!
(づ。◕‿‿◕。)づ


Chinese Custard Bun | Lai Wong Bao 奶黄包
Custard Bun Ingredients
Custard
✿ 35 Grams Flour
✿ 40 Grams Custard Powder
✿ 110 Grams Sugar
✿ 35 Grams Milk Powder
✿ 1 Egg
✿ 80 Grams Butter
✿ 45 Grams Condensed Milk
✿ 190 Milliliters Milk
Custard Recipe Instructions
Dough Day 1:
✿ Special Bun Flour / All Purpose Flour
✿ Starter Dough*
✿ Water
*To make the starter dough mix a little bit of flour (about 2-3 tablespoons) with a little bit of water until a non sticky dough forms. Leave it overnight on the countertop and it’s ready to use the next day.
Dough Day 2:
✿ Dough From Day 1 (Measure it!)*
✿ 1 Tablespoon Butter
✿ 1 Egg White
✿ 2 Grams Cream Of Tartar
✿ Special Bun Flour / All Purpose Flour *
✿ Sugar *
✿ Double Acting Baking Powder *
✿ Ammonia Baking Powder *
* These Ingredients Needs To Be Measured.
*For every 1000 Grams of dough you need:
232 Grams Bun Flour / All Purpose Flour
232 Grams Sugar
16 Grams Double Acting Baking Powder
1.6 Grams Ammonia Baking Powder
How to calculate?
Grams Of Ingredients / 1000 x You Dough
EXAMPLE:
If your dough from day 1 weighs 740 grams.
You want to know how much sugar you need ->
232 / 1000 x 740 = 171.68
You will need 171.68 Grams of sugar.
Custard Bun INSTRUCTIONS | Click here for the recipe video

Custard Filling
Steam Custard Filling 15 - 20 Min.

Cool Down
Refrigerate Until Use.

Dough Day 1
Prepare Dough.

Day 2:
Make Dough
Measure Ingredients For Dough

Knead Dough
Knead Until Non Sticky Dough Forms.

Prepare Filling
Separate Custard Filling

Divide Dough
Cut Dough In Equal Pieces.

Close Bun
Fold Custard Bun

Steam
Steam Buns 10 Minutes.
Day 1:
Let’s make the egg custard filling for our buns. Combine all the ingredients for the custard filling and steam until ready.
Check this link for more details on how to make the custard.
Transfer it to a bowl, let it cool down and place in the fridge overnight.
Let’s make the dough. No measurements needed!
*I used 3 bowl of flour
Add starter dough to the flour, slowly add water
and knead until a non sticky dough forms.
*At this point you can save a piece of starter dough for the next time. Refrigerate for about 2 weeks or up to 3 months in the freezer.
Rest dough overnight at room temperature
Day 2:
Measure your dough you made on day 1 and the other ingredients. See Ingredient list how to measure.
or WATCH The Video
To make the dough first add the butter and sugar. Knead until the sugar is incorporated. Add double acting baking powder, ammonia baking powder, cream of tartar and the egg white. Mix until combined. Lastly add the flour and knead until dough forms. Add more flour if needed. Set aside while preparing the filling.
For the filling divide custard in preferred sizes. Roll each piece into a ball.
Let’s start making the buns! Knead dough a little and roll in a string. Cut or rip in equal pieces. To make the bun fluffy take 1 piece of dough. Press the dough in the middle with your thumb and wrap the outside dough around. Do it several times until it bounces back when you press it.
Flatten the ball a little bit. Roll the side of the dough flat while keeping the middle thick. Place custard in the middle and close the bun. Round the bun a little bit and its ready. Repeat with all.
Steam the buns for 10 minutes on HIGH flame.
*Don’t open the lid
Buns are best eaten when hot! ✿◕ ‿ ◕✿
TIPS & NOTES
✿ Starter Dough: to make the starter dough mix a little bit of flour (about 2-3 tablespoons) with a little bit of water until a non sticky dough forms. Leave it overnight on the countertop and it’s ready to use the next day.
✿ The dough you make on the 1st day can be used for next time as starter dough. Take off a little piece of dough and save it for next time. Stays good in the fridge for about 2 weeks or up to 3 months in the freezer
✿ There are no measurements needed on the 1st day making the dough. On the 2nd day when making the dough you need to measure the ingredients.
✿ To make these buns you can use special bun flour or all purpose flour. Special bun flour is extra white and more fluffy.
✿ In the winter use WARM water to make the dough. In the summer use COLD water to make the dough.
✿ These bun dough is on the sweet side. You can adjust the sweetness of the bun by reducing the sugar.
✿ For the custard, instead of steaming it you can also cook it in a nonstick pan on low - medium heat until the custard forms.

Did you make this recipe?
If you made this recipe make a picture and hashtag #PYsKitchen or Tag me @PYS.kitchen. I would love to see your creations on instagram! ✿◕ ‿ ◕✿
Click here for the printable recipe! (Coming Soon)
More Asian & Dim Sum Recipes!
Popular Topics

Find me here!

AFFILIATEs For This Recipes


** DISCLAIMER: PY’s Kitchen’s website uses affiliate links. Amazon Affiliate links do not cost extra but do help support the website by providing a small commission on qualifying purchases that allows me to keep producing more content! (◠‿◠✿) PY’s Kitchen does not provide the products and does not guarantee the quality of the products. These links are provided to assist in obtaining similar items used by PY’s Kitchen during the filming process. Buyers purchase at their own discretion. Thank you for your support!
(づ。◕‿‿◕。)づ